5. Get started with reviews (Basic and up)
On this page: You show reviews on your product pages and let customers write them. Review requests and moving old reviews can wait until you need them. It takes about 15 minutes.
The review settings are on the "Settings" tab of "Reviews" in the app. They're split into five sections, from top to bottom. The features are described in more detail on the Reviews page.
1. On your store
First, add the review blocks to your theme. The "On your store" section of the settings shows whether they're in place.
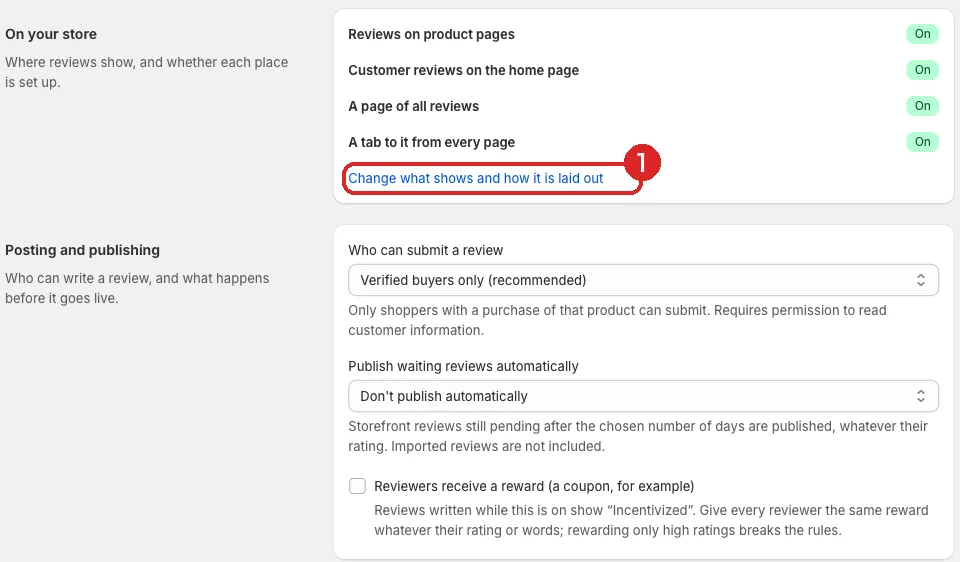
- Change what shows and how it is laid out: Once the blocks are in place, change how they look on the Design page
| Block | Where it goes | How to add it |
|---|---|---|
| Product Reviews | Product page | "Add block" → "Apps" → "Product Reviews" |
| Review Badge | Near the product title | "Add block" → "Apps" → "Review Badge" |
| Customer reviews (carousel) | Home page or elsewhere | "Add section" → "Apps" → "Customer reviews (carousel)" |
| Customer reviews (reviews page) | A page you create for reviews | See the steps below |
| Reviews tab (screen edge) | App embeds | Turn it on in "App embeds" |
In the theme editor, the blocks you added are listed in the left menu.
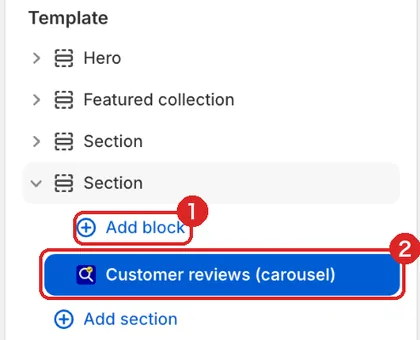
- Add block: Adds a Marutto Search block inside a section
- Select a block you added to open its settings, such as colors and the number of reviews
Once they're added, your store shows them like this.
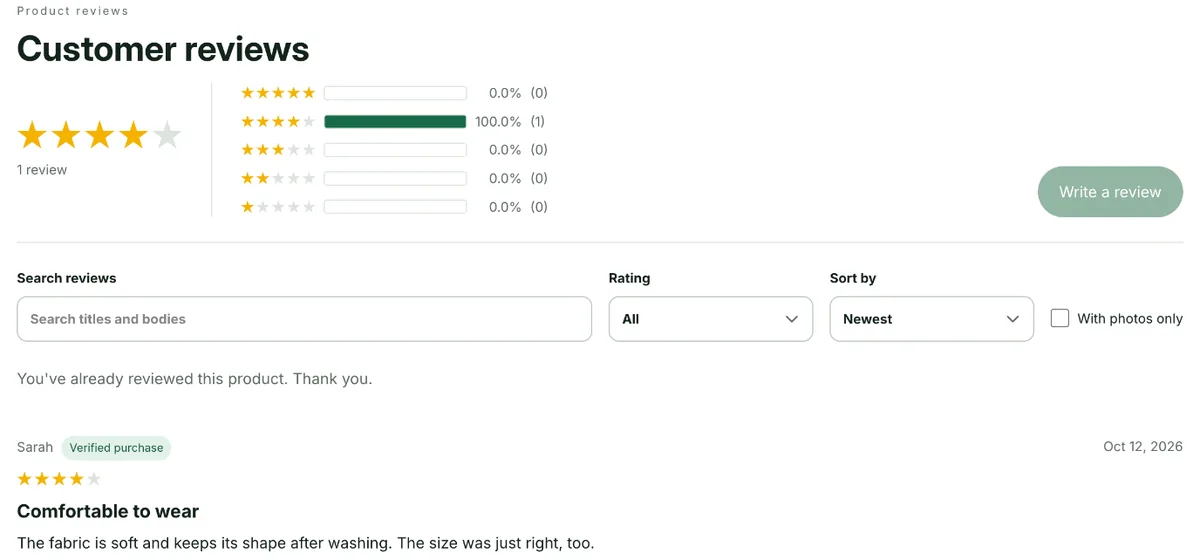
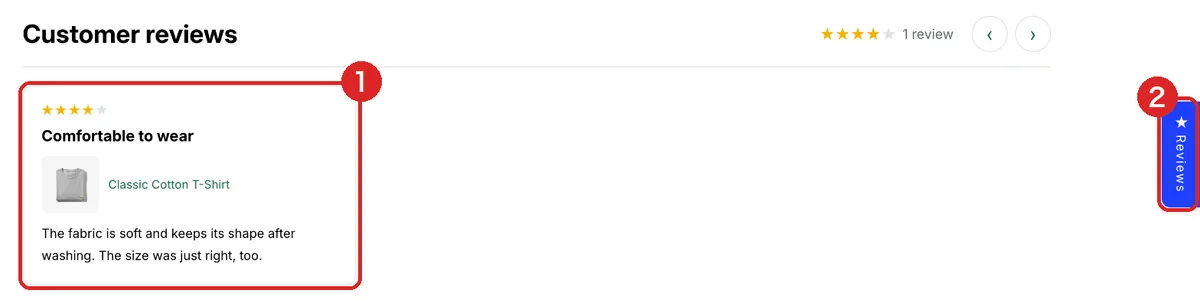
- Customer reviews (carousel): Your store's newest reviews, side by side
- Reviews tab: Takes shoppers to the reviews page from any page
Create a reviews page
- In your Shopify admin, go to "Online Store → Pages" and create a new page (for example, with the title "Customer reviews")
- In the theme editor, open the page template, click "Add section" → "Apps" and choose "Customer reviews (reviews page)"
- In the block's "Page to show it on" setting, choose the page you created
If you use the tab at the edge of the screen, choose this page in the tab's "Page to open" setting too. The tab doesn't show until you choose a page.
2. Posting and publishing
- Who can submit a review: Choose "Verified buyers only (recommended)" or "Logged-in shoppers". For verified buyers only, click "Allow reading customer information" and approve the permission
- Publish waiting reviews automatically: The default is "Don't publish automatically". Check new reviews on the "Reviews" tab, then publish them
- Reviewers receive a reward (a coupon, for example): Turn this on if you give reviewers a coupon or another reward. Their reviews show "Incentivized"
How to reward reviewers
Give everyone the same reward, whatever their rating or what they write. Giving a reward only for high ratings is a violation.
To accept reviews with photos, click "Enable photo uploads" and approve the permission.
3. Review requests
Ask customers whose order has shipped to write a review. Requests are sent from Shopify Flow (Marutto Search never sends emails itself).
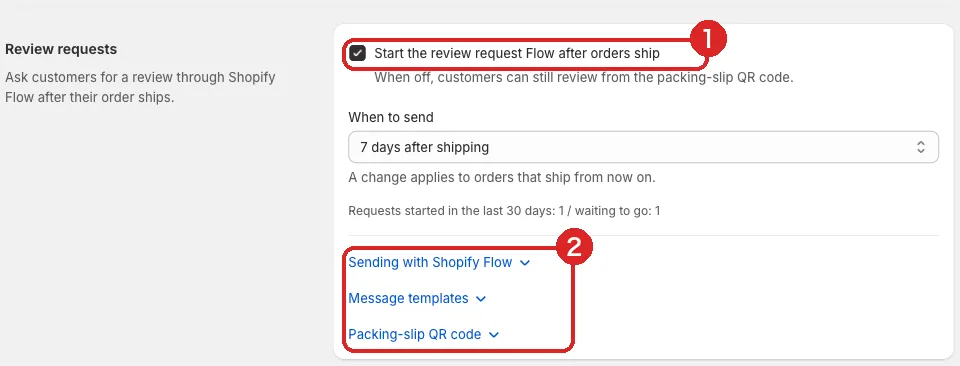
- Start the review request Flow after orders ship: Turn it on and choose "When to send" (3, 7, 14 or 30 days after shipping)
- Sending with Shopify Flow, Message templates and Packing-slip QR code: Open them for the steps, message templates for email and for LINE or SMS, and a QR code to print
- In Flow, use Marutto Search's trigger "Review request due" (shown as "レビュー依頼の時期 / Review request due"). Put the variable "reviewUrl" in the body of your email
- The packing-slip QR code is the same for every parcel. Customers who scan it and sign in go to the review page for their most recent order
4. Stars and search
- Export product ratings: Writes the average rating and count of your Marutto Search reviews to Shopify's standard product rating. Your theme, and other apps that read ratings, can then show the stars too. Click "Allow and export" to start. If another review app is your main one, turn this off
- Use in product search (Pro): Lets shoppers find products by the words in their reviews
If you use another review app (Judge.me, for example), its stars also show in search results, and shoppers can filter by rating. No setup is needed.
5. Moving and data
- Import CSV: Use this when you switch from another review app. It reads export files from Judge.me, Loox, Junip, Yotpo, Okendo, Stamped and Shopify Product Reviews as they are. The steps are in 6. Switch from another review app
- Download CSV: Use this to back up your reviews
- Refresh purchase history: Click this when customers who bought a product see "We couldn't verify your purchase of this product." It reads your past orders again
Next: 6. Switch from another review app. For stores that used another review app. If you didn't, go on to 7. Adjust how it looks.